T-shirts are everywhere. They’re in our closets, on our favorite celebrities, and hanging in stores across the globe. But while they might look simple, t-shirts are more than just basic apparel. They’re a blank canvas for expression, culture, and business.
If you’ve ever thought about printing your own t-shirts, whether for fun, for a cause, or as the start of a business, you’re not alone. Custom t-shirt printing has exploded in popularity in recent years. And with new technologies and easy-to-use equipment, it’s more accessible than ever.
Still, printing your first shirt can feel overwhelming. What fabric should you choose? Which printing method is right? What tools do you need? This guide answers those questions and walks you through everything you need to know before you start.
Understanding T-Shirt Printing Basics
At its core, t-shirt printing is about transferring a design onto fabric. That could be a logo, a slogan, or even a full-color illustration. But not all printing methods are created equal. Some are better for bold, simple graphics, while others are designed for detailed artwork.
The purpose also matters. Are you making a shirt for a one-time event, like a family reunion? Or do you want to sell a line of shirts online? The way you approach printing changes depending on your goals.
Think of t-shirts as communication tools. They speak for you before you say a word. That’s why choosing the right printing method and materials is so important.
Choosing the Right T-Shirt Fabric
Not all shirts are created equal. The type of fabric you use has a huge impact on the final result.
- Cotton: Soft, breathable, and versatile. Cotton works well with most printing methods, especially screen printing and direct-to-garment (DTG). The downside? It can shrink if not pre-washed.
- Polyester: Durable and great for athletic wear. However, not all printing methods work well on polyester. Sublimation, though, loves it.
- Blends: Cotton-poly blends offer the best of both worlds—comfort and durability. They’re popular for casual wear and often print beautifully.
For your first shirt, cotton is a safe bet. It’s easy to print on, widely available, and feels good to wear.
Popular T-Shirt Printing Methods Explained
Here’s where things get exciting. Printing methods vary widely, and each one has its strengths and weaknesses.
- Screen Printing: The most traditional method. Ink is pressed through a stencil (or screen) onto fabric. Screen printing creates bold, vibrant colors that last. It’s great for bulk orders but less efficient for small runs with detailed designs.
- Heat Transfer: This method uses transfer paper and a heat press to apply designs to shirts. It’s affordable and beginner-friendly but not as durable as other methods. After a number of washes, designs may start to crack or peel.
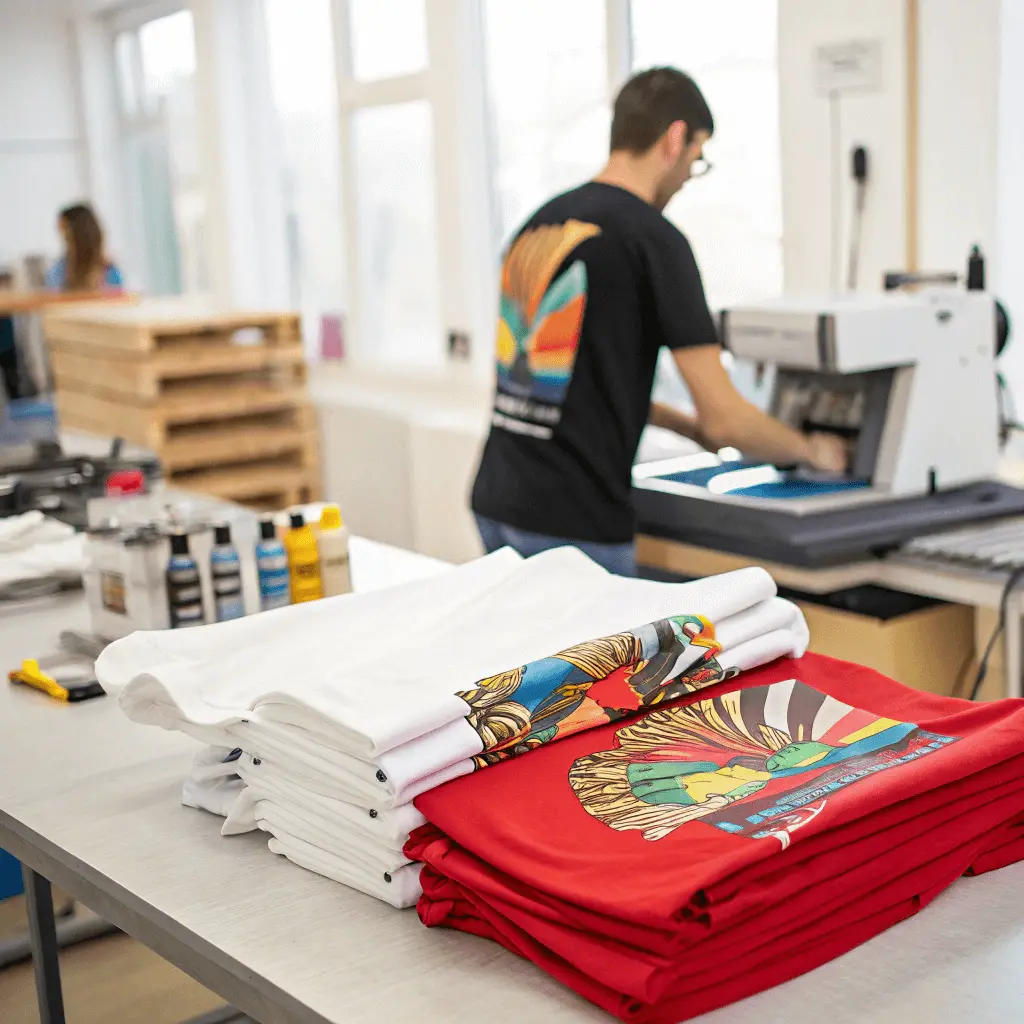
- Direct-to-Garment (DTG): Think of it as an inkjet printer for shirts. DTG prints directly onto fabric, producing high-resolution designs with lots of detail. It’s perfect for small batches, but the equipment can be expensive.
- Direct-to-Film (DTF): A rising star in the industry. Designs are printed onto a film and then transferred to the shirt using heat. Printers like the Prestige R2 DTF Pro printer make this method more accessible than ever. DTF stands out because it works on a wide variety of fabrics and produces durable, vibrant prints.
- Sublimation: This process turns dye into gas and bonds it to polyester fibers. The results are stunningly vibrant, but it only works on light-colored polyester shirts.
The method you choose depends on your goals. For one-time projects, heat transfer may be enough. For long-lasting, high-quality prints, DTG or DTF could be the smarter investment.
Essential Tools and Supplies You’ll Need
Getting started doesn’t mean buying a factory’s worth of equipment, but you do need the right basics.
- Heat Press Machine: Essential for heat transfers, sublimation, and DTF printing.
- Screen Printing Kit: Includes screens, squeegees, and inks. Perfect for those interested in traditional methods.
- Vinyl Cutter: Great for creating custom shapes and lettering.
- Printers (DTG or DTF): These allow full-color, detailed designs with professional results.
- Design Software: Programs like Adobe Illustrator, Photoshop, or even Canva let you create and refine your artwork.
The tools you need depend on the printing method you choose. Beginners often start with heat transfer or basic screen printing because of the lower upfront costs.
Designing Your First T-Shirt
The design is the heart of your shirt. Even with the best equipment, a weak design won’t stand out.
- Resolution matters: Aim for at least 300 DPI for crisp, clear prints.
- Color choices: Consider contrast. Light designs pop on dark shirts, and bold colors stand out on white tees.
- Placement: Center chest designs are the classic choice, but don’t forget sleeves, pockets, or even back prints for variety.
A simple rule: start small. Test a straightforward design before moving on to complex artwork.
Step-by-Step: Preparing for Your First Print
Here’s a beginner-friendly roadmap:
- Pre-wash your shirts to reduce shrinkage.
- Prepare your design using software and ensure it’s high resolution.
- Choose the right settings on your printer or heat press.
- Do a test print on scrap material or an old t-shirt.
- Apply the design carefully, watching alignment and placement.
- Inspect the final product for quality before making more.
It might take a few tries to get it perfect. Don’t worry—mistakes are part of the learning process.
Common Mistakes Beginners Make (and How to Avoid Them)
Printing t-shirts can be fun, but it’s easy to slip up. Here are some pitfalls to watch for:
- Using low-quality materials: Cheap ink or paper often leads to faded, cracked designs.
- Skipping pre-treatment: Especially for DTG printing, pre-treatment helps ink stick properly.
- Misaligned prints: Even a small shift looks unprofessional. Always double-check placement.
- Not testing first: Running a batch without testing often ends in wasted shirts and frustration.
Avoiding these mistakes saves time, money, and headaches.
Tips for Long-Lasting Prints
A beautiful shirt isn’t worth much if it fades after two washes. Here’s how to make your designs last:
- Wash shirts inside out to reduce friction.
- Use cold water and gentle cycles.
- Avoid harsh detergents and bleach.
- Air dry or tumble dry on low to prevent cracking.
Quality inks and fabrics also play a role. Don’t cut corners if durability is your goal.
Should You Print at Home or Use a Professional Service?
For many beginners, the big question is whether to invest in equipment or outsource.
- DIY Printing: Great for small runs, personal projects, or learning the ropes. It’s cost-effective if you only need a few shirts.
- Professional Services: Ideal for bulk orders, complex designs, or when you want guaranteed quality. While it costs more upfront, it saves time and reduces errors.
There’s no wrong choice—just what fits your goals. Many people start at home and transition to professional services as demand grows.
Conclusion
Printing your first t-shirt is an exciting step. Whether you’re making a shirt for yourself, your friends, or a budding business, the process combines creativity with craftsmanship.
By understanding fabrics, exploring printing methods, gathering the right tools, and avoiding beginner mistakes, you’ll set yourself up for success. With options ranging from simple heat transfers to advanced techniques using machines like the Prestige R2 DTF Pro printer, there’s a path for every budget and ambition.
Remember: start small, experiment, and don’t be afraid to make mistakes. Every pro printer was once a beginner staring at their first blank tee.